Also, this kind of serves a dual purpose. If you are referencing the post Obfuscating your IP via Burp/Tor/Privoxy then you may wish to combine all this into one obfuscated and calculated attack.
So I'm using BackTrack 3 to operate Nikto/Burp.
Lets get started. In BackTrack3, navigate to the /pentest/web/nikto directory. If you enter 'ls' or 'dir' you will notice a file named config.txt
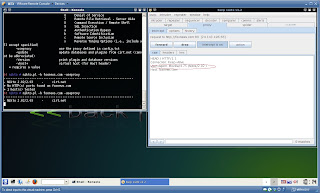
Now I used kedit to open the config.txt file and scrolled down (in the config file of course) to the line referencing proxy options like so:
The trick here is simply to remove the # symbol in front of the two lines that indicate proxy IP and port number. Obviously if you need to change these settings you can do so as well rather than just "un-commenting" the options (which makese them active). Anyways, we just removed the # symbol and saved the changes to our config.txt file.
Now if you'd like to run this and are not interested in changing the User Agent Header then simply append the -useproxy option to nikto as shown in this photo:

Now if you would like to modify Nikto's User-Agent (to bypass certain detection systems) then follow the rest of this post.
So I have ruby installed AND the ruby gem mechanize which already has a list of User-Agents inside of it. So, while there is probably a more comprehensive list this is what I chose.
Out of this I made a list which I sent over to the BT3 VM. The list was cleaned up just a bit so it could be a copy and paste sort of deal. Looks like this:
To set a match and replace (Match "Nikto's User-Agent / Replace with another User-Agent), Navigate to Burp > Proxy > Options. Scroll down to 'match and replace'. Enter the following (I chose the Linux/Konqueror user-agent) and click 'add'. Just make sure that the box is checked next to the request header to indicate the option is in use:
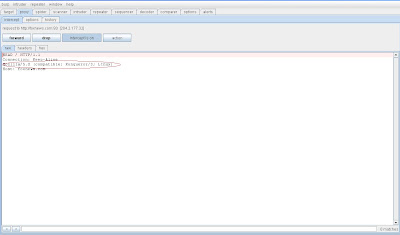
Okay, so now we simply run nikto again using the -useproxy. Just to make sure it worked though, I actually had two instances of Burp running. The first instance is the one Nikto is sending traffic to. The second instance of Burp is receiving requests from the first instance of Burp. This way I can watch the traffic and take a nice screen shot for you. BTW, if you interested in doing that reference my post Here.
Anyway, lets have a look and see if the Nikto User-Agent in the header is replaced.

It worked like a charm.
Happy Hacking!


No comments:
Post a Comment