Saturday, September 26, 2009

BToD Permanently modifying your Burp Suite payload strings.


Last week I showed you a couple of Oracle payloads you could load up into the intruder preset payload list Here. I'm sure at least one person thought to themselves, instead of loading the list from a file and keeping track of various files can't we just add this to our fuzzing list permanently? The answer is yes and we will walk thru it together.

The first thing we need to do is unzip our burpsuite jar file.I'm using 7zip which you can obtain here.


We now have a newly created folder containing the files that make up burpsuite.


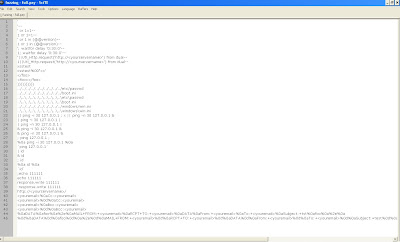
Open the newly created folder and navigate to \burp\PayloadStrings\ and open the file you would like to edit. In our case, this file is 'fuzzing - full.pay'. I am using SciTe to edit the file but you can also use something like notepad++.


So go ahead and make your changes, I've added the Oracle payloads as mentioned before.


Save the file and exit. Zip the the contents of the folder as a JAR file like so:


Okay, well I moved this jar file back into the "C:\burpsuite_v1.2_pro\" directory and deleted the "C:\burpsuite_v1.2pro\burpsuite_pro_v1.2.16\" folder.

Now lets start it up and check to see if it worked.


Yep, it worked alright. Okay, so if you have any questions feel free to ask.

Happy Hacking!

~cktricky
cktricky

Thursday, September 24, 2009

BToD > Intruder & Probing for Oracle's OWA_UTIL stored procedure


Today I am just giving a cheat sheet for loading into Burp via the Intruder > Preset List Payload Set. This list contains known Oracle owa_util.cellsprint bypasses (minus the first one). This way you can detect whether or not you have a vulnerable stored procedure. Probably not a good idea to have the PL/SQL gateway out in the open but if it is now you can detect whether or not its easily exploited.

The preset list contains:

owa_util.cellsprint?p_thequery=select+1+from+dual
%0Aowa_util.cellsprint?p_thequery=select+1+from+dual
S%FFS.owa_util.cellsprint?p_thequery=select+1+from+dual
*SYS*.owa_util.cellsprint?p_thequery=select+1+from+dual
<<"LBL">>owa_util.cellsprint?p_thequery=select+1+from+dual

NOTE: STRIP THE QUOTATION MARKS OUT FROM ENCLOSING LBL SO IT IS ONLY LBL. I just had to enclose them to bypass blogspot's filter.


So create a notepad file containing this list. Send request for http://server.example.com/pls/dad/vulnerable_procedure into Intruder.

Navigate to Intruder > Positions and add position markers around vulnerable_procedure like so:


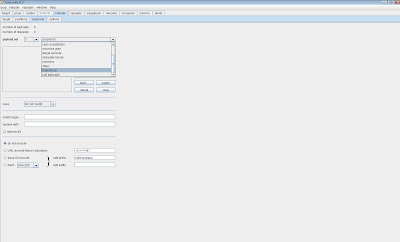
Navigate to > Payload Preset List and click 'load':


 Open the oracle payload file:


Then start!


If you have a 403 response you know you won't be able to access this. Otherwise, game on.


Happy Hacking!
cktricky

Wednesday, September 23, 2009

BToD > Intruder & Brute Forcer to view all potential values with responses


Previously, we had discussed using Intruder to brute force authentication by utilizing the Intruder's 'preset list' payload set. Now we will discuss using the ACTUAL Intruder brute force payload.

Now of course we are all aware of what comes to mind when you say "Brute Force" but what about another use? What if crappy entropy produces a value that is say AJJDAJJDASDFHGHABC but only the last three characters "ABC" change? This could be a session value and could be attacked as discussed in Sequencer & Entropy  OR it could be value such as 'resource=' which renders sensitive content. Your profile and the resource it can access might be client-side controllable and it may be as simple as iterating thru all possible combinations of that value.

In our scenario we will say that our sequencer has informed us of the weak entropy and those last three characters iterate between different combinations of ABCDEF (but not the rest of the alphabet) and only use upper case characters.

By now I assume you know how to load a payload or 'request' into Intruder. If not, reference any of the other BToDs for clarification. Navigate to Burp > Intruder > Positions Tab. Add position points around 'ABC' since this is what we will be iterating thru and collecting the responses.

Should look like this:


Next, navigate to Intruder > Payloads. Drop down the payload set list and choose 'brute forcer'.


In the picture below I show what the default settings are and the 4 settings we care about. Remember we know we will only use the characters ABCDEF, they will only be three characters and finally they will always be uppercase.


Character set - only include the characters we are interested in, the min and max length is 3 and case is Uppercase. Should look like this:


We are all set. Now start attacking............


Use the results to check for byte length (if attacking a session) or save the responses to prove to your customer you can view data that you should not be able to. Either way, enjoy.

Happy Hacking!

cktricky

Tuesday, September 22, 2009

BToD > Target-Site Map & Proxy-History filter options


Been busy lately, haven't had much time to perform updates of the Burp Suite Tip of the Day. Today I'd like to cover a couple significant utilities included with the Burp Suite. Much of the appeal with this Suite, at least for me, comes not only with the functionality but also the aesthetics. When you spend about 10-12 hours a day using this tool you begin to appreciate the subtle improvements that have occurred with every upgrade. Even for the 'free' versions user base there is a noticeable difference between 1.1 and 1.2. Lastly before we start, I'd like to recommend as always that a Pro version upgrade be purchased at some point if you find the free version useful. Its 202$ so its not much. You can do so Here.

Navigate to Target > Site Map because this is where we will identify a few of the useful features here. Mostly we use the filter options, or at least I do, to cut down on what I like to call "noise". Really all that means is sometimes the amount of data can be overwhelming and I am only looking for specific things. Why not filter for those items?

Open the filter options by clicking here:


Now out of all the sites listed in the site map tab we only need two. We will focus on http://twitter.com and https://twitter.com (http/s is important disctinction to remember when testing a site). One thing I remind folks of is to always add both the HTTP and HTTPS versions of the target application in the the Target > Scope just in case the site requests resources such as image files over HTTP (therefore potentially negating the reason for using SSL if session/cookie values are sent in that request).

Easy way to add them at the Target > Site Map tab is like so:


Okay now that these are added to our scope, lets use the filter option to view only those two applications and cut down on the "noise":

Open the filter again. You will see four columns
1) 'filter by request type'
2) 'filter by MIME type'
3) 'filter by status code'
4) 'folders'

Under the first collumn check 'show only in-scope items'. This will allow you to view only the two applications we've just added to target scope:


Afterwards, you will notice a more focused site map:


The next option under this same collumn is 'show only requested items'. This is shows pages requested either by the spider or you via browser (or if you have a other programs going requesting thru Burp say....screen scraping script/nikto/wikto/etc.). No need for a demo here. Simple.

Show only 'parameterised requests' is pretty cool. If you've gone about the business of submitting every form (or even if you haven't and spider has crawled pages with parameterized queries) its great to show these points of input so you can logically step thru them and keep track of your attack! The results render a gear to the left symbolizing them as parameterized queries. I've highlighted the gears:


Most of this stuff is self explanatory but just remember what I said about an HTTPS site requesting a resource such as images while including an important session value over HTTP. This means you actually have to show the images. So click on that option under 'filter by MIME type':


Navigate to the Proxy > History tab. The filter options are pretty much the same really. However, what I'd like to show is in the actual history itself. So I've chosen NOT to 'show only in-scope items' to show a distinction:


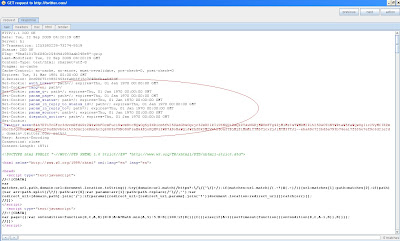
Often times when testing I ask, okay, so when was the last time my cookie was set or where was it first set. The 'cookies' section I've highlited actually shows which cookies were set by request number and the time. Pretty cool stuff, keeps a lot of re-work down to a minimum when answering session related questions.

I've also highlighted the row we will "double-click" to show the response containing the 'set-cookie'.


Finally, after we have opened up the request/response which triggered the cookie value, we navigate to the response tab and here the "set-cookie(s)" were highlited:


All of this is fairly basic but nonetheless useful if you are new to Burp Suite.

Happy Hacking!
cktricky

Monday, September 21, 2009

Using NMAP via VPN


This morning, tried running nmap for the first time via VPN which means dual interfaces meaning dual routes to target etc. etc. and since this is a windows box the nmap -e wasn't working for me.

I received the "failed to determine dst mac address  for target" error.

Anyway, the solution I found worked and it was simple.

Find your mac address, ipconfig /all or arp -a and tie it to the current VPN IP.

From windows command line just enter

arp -s "vpn ip" "mac address"

When you run nmap it should work.

~cktricky
cktricky

Friday, September 18, 2009

BToD Nikto thru Burp & Masking Nikto Headers


Its Friday and I think we should finish the week strong! So today we are talking about using Nikto thru Burp & how to mask the default Nikto Header with another header of your choosing. When pen-testing you could get cut off before even leaving the gates due to that signature Nikto User-Agent in the 'Request Header'. Granted, you can modify the Nikto code directly to modify the header but where is the fun & flexibility in this?

Also, this kind of serves a dual purpose. If you are referencing the post Obfuscating your IP via Burp/Tor/Privoxy then you may wish to combine all this into one obfuscated and calculated attack.

So I'm using BackTrack 3 to operate Nikto/Burp.

Lets get started. In BackTrack3, navigate to the /pentest/web/nikto directory. If you enter 'ls' or 'dir' you will notice a file named config.txt


Now I used kedit to open the config.txt file and scrolled down (in the config file of course) to the line referencing proxy options like so:


The trick here is simply to remove the # symbol in front of the two lines that indicate proxy IP and port number. Obviously if you need to change these settings you can do so as well rather than just "un-commenting" the options (which makese them active). Anyways, we just removed the # symbol and saved the changes to our config.txt file.

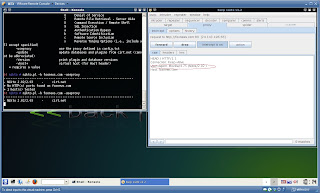
Now if you'd like to run this and are not interested in changing the User Agent Header then simply append the -useproxy option to nikto as shown in this photo:


Now if you would like to modify Nikto's User-Agent (to bypass certain detection systems) then follow the rest of this post.

So I have ruby installed AND the ruby gem mechanize which already has a list of User-Agents inside of it. So, while there is probably a more comprehensive list this is what I chose.


Out of this I made a list which I sent over to the BT3 VM. The list was cleaned up just a bit so it could be a copy and paste sort of deal. Looks like this:


To set a match and replace (Match "Nikto's User-Agent / Replace with another User-Agent), Navigate to Burp > Proxy > Options. Scroll down to 'match and replace'. Enter the following (I chose the Linux/Konqueror user-agent) and click 'add'. Just make sure that the box is checked next to the request header to indicate the option is in use:


Okay, so now we simply run nikto again using the -useproxy. Just to make sure it worked though, I actually had two instances of Burp running. The first instance is the one Nikto is sending traffic to. The second instance of Burp is receiving requests from the first instance of Burp. This way I can watch the traffic and take a nice screen shot for you. BTW, if you interested in doing that reference my post Here.

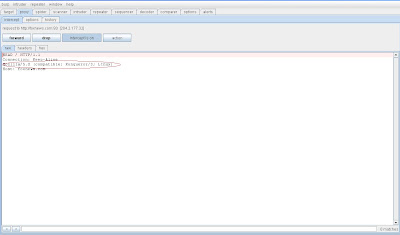
Anyway, lets have a look and see if the Nikto User-Agent in the header is replaced.


It worked like a charm.

Happy Hacking!


cktricky

Thursday, September 17, 2009

BToD > Viewing x509 Certificates


Today's post is rather simple and is just meant to touch on one piece of functionality that you may or may not know about in Burp Suite.

Navigate to Burp Suite > Comms (Free version) or Burp Suite > Options (Pro version) and scroll down to x509 certificates.


Highlight and click any of the certificates you wish to view and the following pop-up screen will appear:

 
Okay so that is it. Shows a whole bunch of information on the certificate. Not much too it but I've found that some folks didn't know about this feature so I figured it would be worth mentioning.
Happy Hacking!
cktricky

Wednesday, September 16, 2009

BToD > Burp's Web Interface


Today's Burp Suite tip of the Day is about the Burp Suite web interface. What makes it cool? I can only tell you what I think it works well for. Burp's 'Repeater' tool is awesome and in fact a HUGE time saver. Drawback? Well the response to your request doesn't render in the browser. That is sort of not fantastic when you would like to prove to a customer via "Visual stimulus" that XSS is possible or something to that effect.

Often times you will find something like XSS in a parameter during form submission. What happens when you would like to repeat this submission but the populated fields are not remembered? Technically speaking you either use repeater (which in our case isn't the optimum choice) or you fill out all the fields again and resubmit testing your code once more, or you try to submit as is (unpopulated forms) but you take the request from proxy history and pully a "copy/paste". All of this seems much more complicated then simply using the Burp Suite Web Interface.

How do you access the interface? Well, when Burp Suite is up and running, go to the browser in which you are working, open a new tab and browse to http://burp  ..........seriously its that easy.

Your screen will look like so:


*Note: If you browser is not set to route traffic thru Burp this will not work. Of course, I am not sure you will run into that situation if you are using this.

The requests are sequential from top to bottom so if you would like to view the last request you made you have to scroll to the bottom.

Once you've found the request for re-submission just click on the link and the following screen will appear:


Once you click the link you can either choose to view the response or repeat the request. Since are tinkering with our request we will choose that option. Then the request is sent to Burp > proxy:


Well, its not the most known portion of Burp but it is certainly effective and another time saver which I think we all enjoy.

Happy Hacking!
cktricky

Lame ph1sh1ng attempt


I opened my e-mail today and apparentely I need to update the Chase account that I dont have. Fair enough? I figured I will analyze the link I'm told to click on and get excited wondering what new and interesting javascript lies within the link or what interesting technique the attacker has sent my way.

Instead, I find a lame replica page.

The link brings you to

mulheressaudaveis.com/chase/update.htm

I haven't clicked on the link to actually observe the site but just based off the lameness of this attack I thought it deserved some ridiculing and nothing more.

The one thing I can say for the e-mail is the grammar was much better than a lot of the other e-mails sent my way. If the goal of the attacker is not to distribute malware but is actually to capture usernames and passwords from current Chase members please please give me your stats! I'd like to say that nobody would fall for this but I believe otherwise.

~cktricky
cktricky

Tuesday, September 15, 2009

BToD Target Scope & Precautions


Today's BToD reminds me of a funny situation I once came across. Okay, funny for me and only after some time had passed but nevertheless a good example of why we ask our customer's questions and why we use the Target > 'exclude from scope' option.

Completely unknown to me, as I was testing, my spider was running. Now the account I was testing with was an account of elevated prvileges. The developers had decided it would make sense to harcode the URI, the stored procedure along with stored procedures parameters (option included) into the page via an HREF. The link looked something like www.example.com/disable_profiles?disable=true........which made for an interesting next few days (this was a production app). I admit I did not specifically ask the development team if functionality like this was hardcoded into the page via HREF.

Interesting to note, it actually took a while for some folks to understand that a pop-up, via JavaScript, warning "this will disable all users profiles" may not actually be 1) visible to an intercepting proxy or 2) be an effective enough deterrent!

Moral of the story, I now ask my customers if they code functionality like this into the pages or any other potentially disruptive functionality I may need to know about.

To exclude this type of functionality from being used by tools such as Spider and Scanner you should perform the following. Navigate to Target > Scope.


Okay, now add your exclusion. You can choose the 'any' protocol option but in my case I know two things. Only port 80 is open and we will be using http. You will see (where highlighted) we've added the protocol [http] the host [www.example.com] the port [80] and finally the actual name of the page we dont want to touch with a ten foot pole [disable_profiles].


Okay, simple enough stuff but in my case a potential '@ss-saver'.

Happy SAFE Hacking!
cktricky

Monday, September 14, 2009

BToD Comparer tool & Basic Detection of BSQLi


This morning's Burp Suite Tip of the Day (BToD) will be about the use of the tool 'Comparer'. In this instance we are analyzing responses to our SQL Syntax (via SQLi). We are detecting SQL Injection but this technique can be used to modify your SQL Syntax to perform the attack correctly as well.

Today's tip is not completely about Comparer since we are also utilizing repeater as well which I've covered in the post Using Repeater.

So I've found my targets administrative login page. Maybe I've used "google" via "site:example.com filetype:asp inurl:/admin" search or simply had the directory listing up front. Either way, we have a target.

Overview:
We've sent the Login submission page to the 'Repeater' tool already and are going to begin testing the individual parameters for SQLi. The most basic test we are going to run is one tick/two tick i.e. Login_username=' and Login_username=''. We are interested in variances in the response based on this input. As a baseline, we've entered known incorrect credentials to the application (Login_username=Bugs+Bunny)and reviewed the response. This application uses the HTTP '302' Method (redirection) to throw users back to the main page in the case of invalid credentials.

This is important because if we were detecting Blind SQLi (which is what folks usually use the One tick/Two tick method for) we'd most likely be submitting the value 'null' when submitting Login_username=''. If SQLi is present, the null input should throw us back to the main page based on what we know of the application's behavior regarding invalid credentials.

To summarize, what I am showing you is not in any way shape or form a subtle difference in the application's response based on SQL Syntax. This is obviously not Blind SQLi. However, using 'Comparer' you most certainly would be able detect ANY difference(s) in the application's response.

Lets demonstrate this whole process and get familiar with the 'Comparer' tool.

We send the request to the application and await the response. This shows the single tick mark request/response.


Next we take the response to this request and send to comparer by 'right-clicking' on the response and choosing 'send to comparer' like so:


Repeat this previous steps only this time submitting the two "tick" marks.


(Sending to the 'Comparer' tool)


Navigate to Burp > Comparer. Screen would look like this:


Above you will notice I've highlighted #5 and #6. These are the numbers assigned to each piece of data you've sent to 'Comparer'. This is simply a nice feature for keeping track.

Okay, so now we want to analyze the differences in these responses. Now, obviously, we can see that a huge difference between these responses exist. One response is 514 bytes and  the other 16607. However, IF this was the case of an error handling page that was different from the normal response but only very slightly (Blind SQLi) we'd be in luck.

Anyway, for sake of providing an example, you'd click on 'compare.....' (bottom right) > words/bytes and the "word compare" screen will pop-up:


Three areas have been highlighted (well by me anyways). You can analyze words or hex so those options exist individually on either side. However, when both responses require scrolling and you'd like to compare side-by-side.........check the 'sync views' box. This is of great help. Also, when this box is checked you will notice that you only have to click text/hex on one side of the word compare tool and the other side will match up automatically. Also a great feature.

Happy Hacking!
cktricky

Friday, September 11, 2009

BToD Ajax & 'Find References' (Pro version only)


Apologies in advance, this post is only helpful if you have the professional version of Burp Suite which can be purchased Here.

This post (specifically) is meant to help folks who test sites utilizing AJAX but the 'find references' function of Burp Suite Pro can be utilized for other reasons as well (of course right?).

When testing an application in which you've found a vulnerable AJAX function, it is beneficial to the customer and your report to note everywhere this function is used within the application.

To use this function it is quite simple. Once you have COMPLETELY finished testing (or at least this is how I do it) and its reporting time, you locate the vulnerable function in your target listing, right click, and click 'find references'. It looks like this..........


Then a results table will pop up with everywhere this function was referenced (my shows none because this was not a real test).

Ensure you check the responses section of where this function was referenced. This is where JS is laid out so it makes sense this is where you will find the function.

Okay, so that is it. Not much to it but something certainly, IMO, worth noting.

Happy Hacking!
cktricky

Wednesday, September 9, 2009

BToD / Client SSL Certificate & CAC


Today's Burp Suite tip is a bit different and is based on some personal headaches I've had and what I've learned this week.

Burp comes with the ability to load PKCS12 Client SSL Certificate. This is a great feature. It is located under Burp > Options (recent versions of Professional) or Burp > Comms (Free version/outdated) and looks like this:


This relates to my situation. I must test a web application using a Common Access Card. I want Burp to establish this SSL relationship with the web application in the same way my browser would. So some things I learned about PKCS12 this week and how to work with Burp.

1) If you can export the certificate then go ahead and passphrase protect it. Burp will ask for your passhphrase accordingly.

2) If and ONLY if the certificate AND private key are marked as exportable will your middleware allow this to happen.

3) Your middleware (my case ActivClient) does not allow the software that exports the cert + private key such as IE, Outlook, etc. to do so when the "not exportable" flag is set. If this flag is set you will notice an attempt to export in IE will look like so:

BTW, to get to this point in IE you would go ahead and navigate to tools > internet options > content > certificates > and choose your certificate and export.

4) If this "Yes, export private key" option is greyed out you will only be able to export in the DER encoded binary x.509, Base-64 encoded x.509 and PKCS#7 format.

5) Again, we need PKCS#12. If your "yes, export private key" is NOT greyed out you are luckier than I. Enjoy and continue on.

6) If not, then you need to ask the Issuing Authority for a copy of your cert + private key with the "not exportable" flag turned off. This can be in either .p12 or .pfx since .pfx (windows version of .p12) can be renamed and work fine or so at least I am told.

Okay, hopefully anyone who has to test sites with CAC/PKI enabled will find some use.

Happy Hacking!
cktricky

Tuesday, September 8, 2009

BToD Using Repeater


Today's tip is regarding the use of repeater. Essentially, I've seen folks modify intercepted requests in their Burp proxy and then submit them to the application and view the response in the web-browser when this is certainly not needed. I've certainly neeeever done this :0, mmm okay okay we are all human. This technique is certainly beneficial in some instances but other times it is very much wasted energy. One good example is waiting for time delays.

If you are probing for Blind SQL Injection and are using time delays......the need to request and subsequently view the response in browser seems unnecessary. So, just a quick intro to repeater and hopefully some time can be saved. Lets get started shall we?

Throw your request into repeater by intercepting the request in your proxy or using proxy history. To do so, right click on the request of interest and select 'send to repeater' like so:


Navigate to the repeater tab and modify your request. In this example I show every tick mark and space URL encoded because I want the point to get across that your repeater content must be modified in comparison to the web browser that performs any encoding for you. So we are ready to fire:


At this point simply click 'go' in the upper left hand corner. You can modify the time accordingly and increment however you may choose. Just make sure to have a stop watch to time the responses for variances in the response.

Three other repeater features to note.

1) If you are testing for forceful browsing OR in our case we know using SSL encrypts and bypasses IDS/IPS detection signatures and we would like to send this request in SSL you can check the 'use ssl' highlighted here:


2) If you notice that you are annoyed by the amount of Repeater tabs you have open you can always choose to delete a tab like so:

3) It may be necessary to follow a '302' redirect sequence all the way to (hopefully) a '200' response. To do so, you can choose this option here:


Happy Hacking!
cktricky